This week we continue the Ultimate Guide to Creating A Drum Cover Video Series by diving into one of the most important steps in creating a drum cover video. Microphone placement. You’ve spent the money on microphones, you might as well learn how to optimize what you have. Afterall, good mic placement will make a world of difference when trying to achieve a good audio record. Let’s get started!
1.) Bass Drum: We start by focusing on the “heartbeat” of the drum kit . The bass drum. Often over looked, a good bass drum sound is very important. We focus on dialing in the bass drum tone in order to build the rest of our sound. As a starting point place the mic within the center of the bass drum. The closer the microphone is to the batter head, the more attack, quick, and bright sound you will achieve. The further away the mic is from the batter head, the more tone you will get. Moving the mic further away also gives you a slower response, ideal for slower songs.
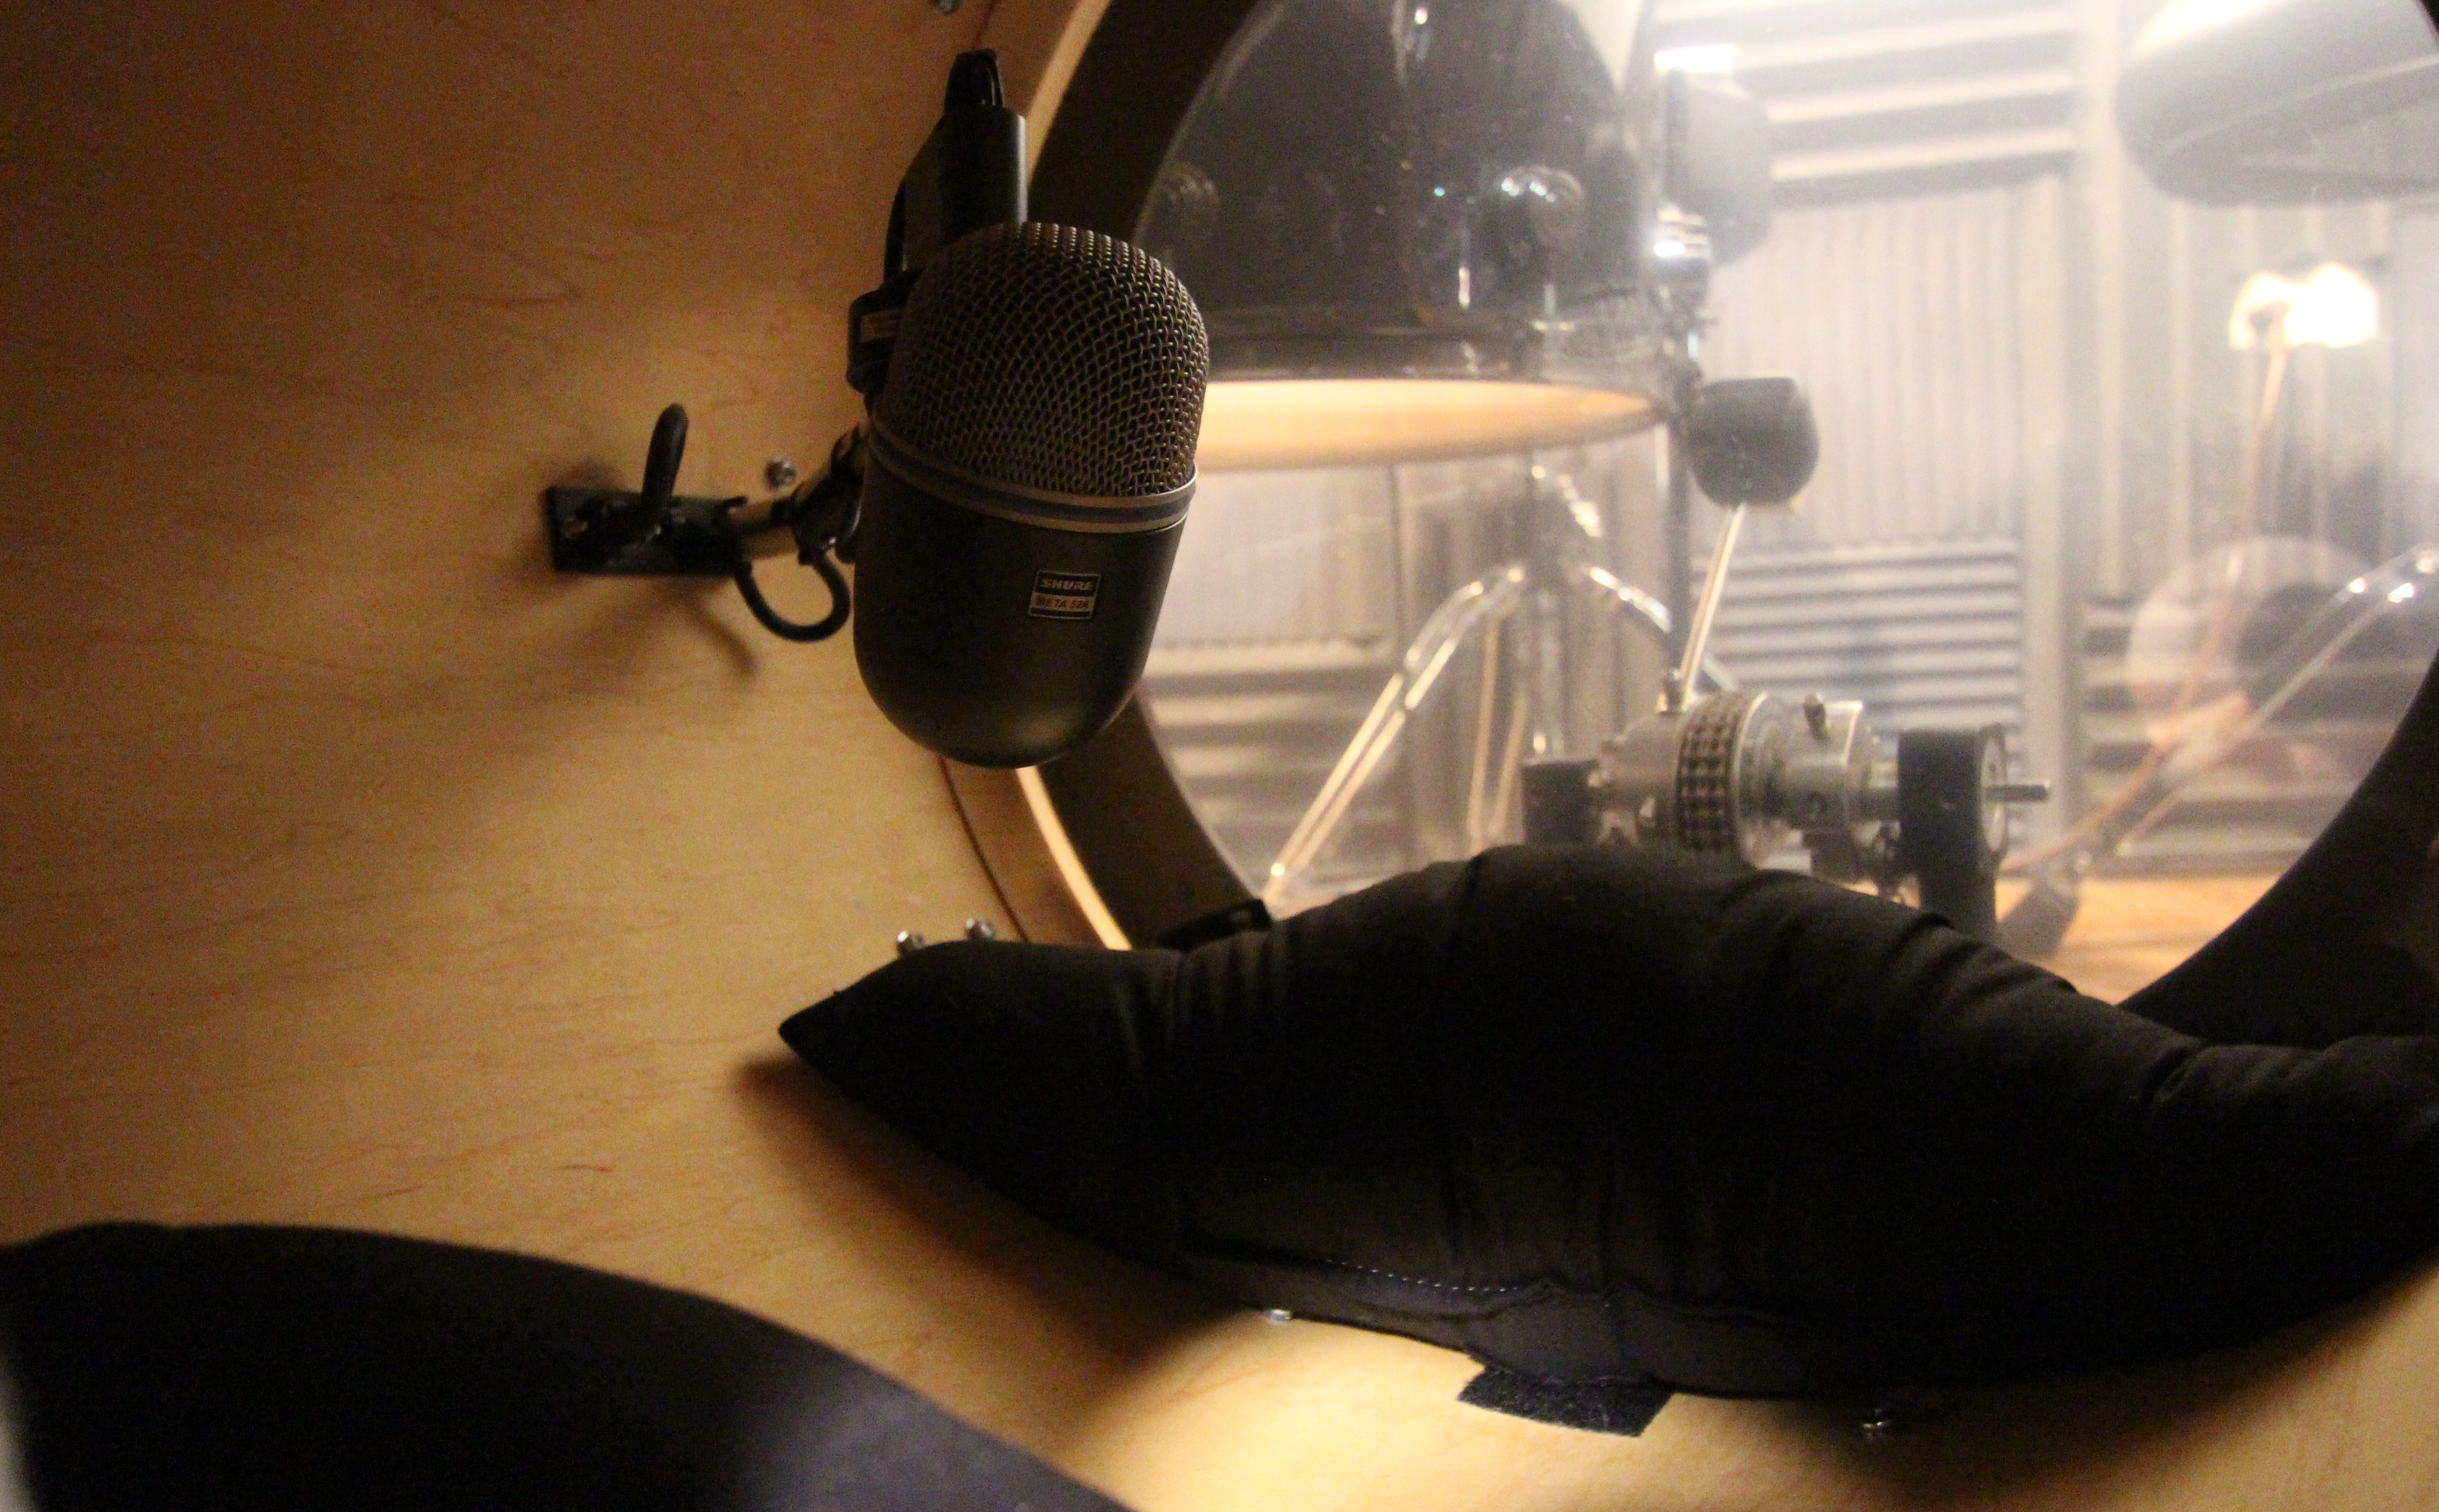
Bass Drum Mic Placement
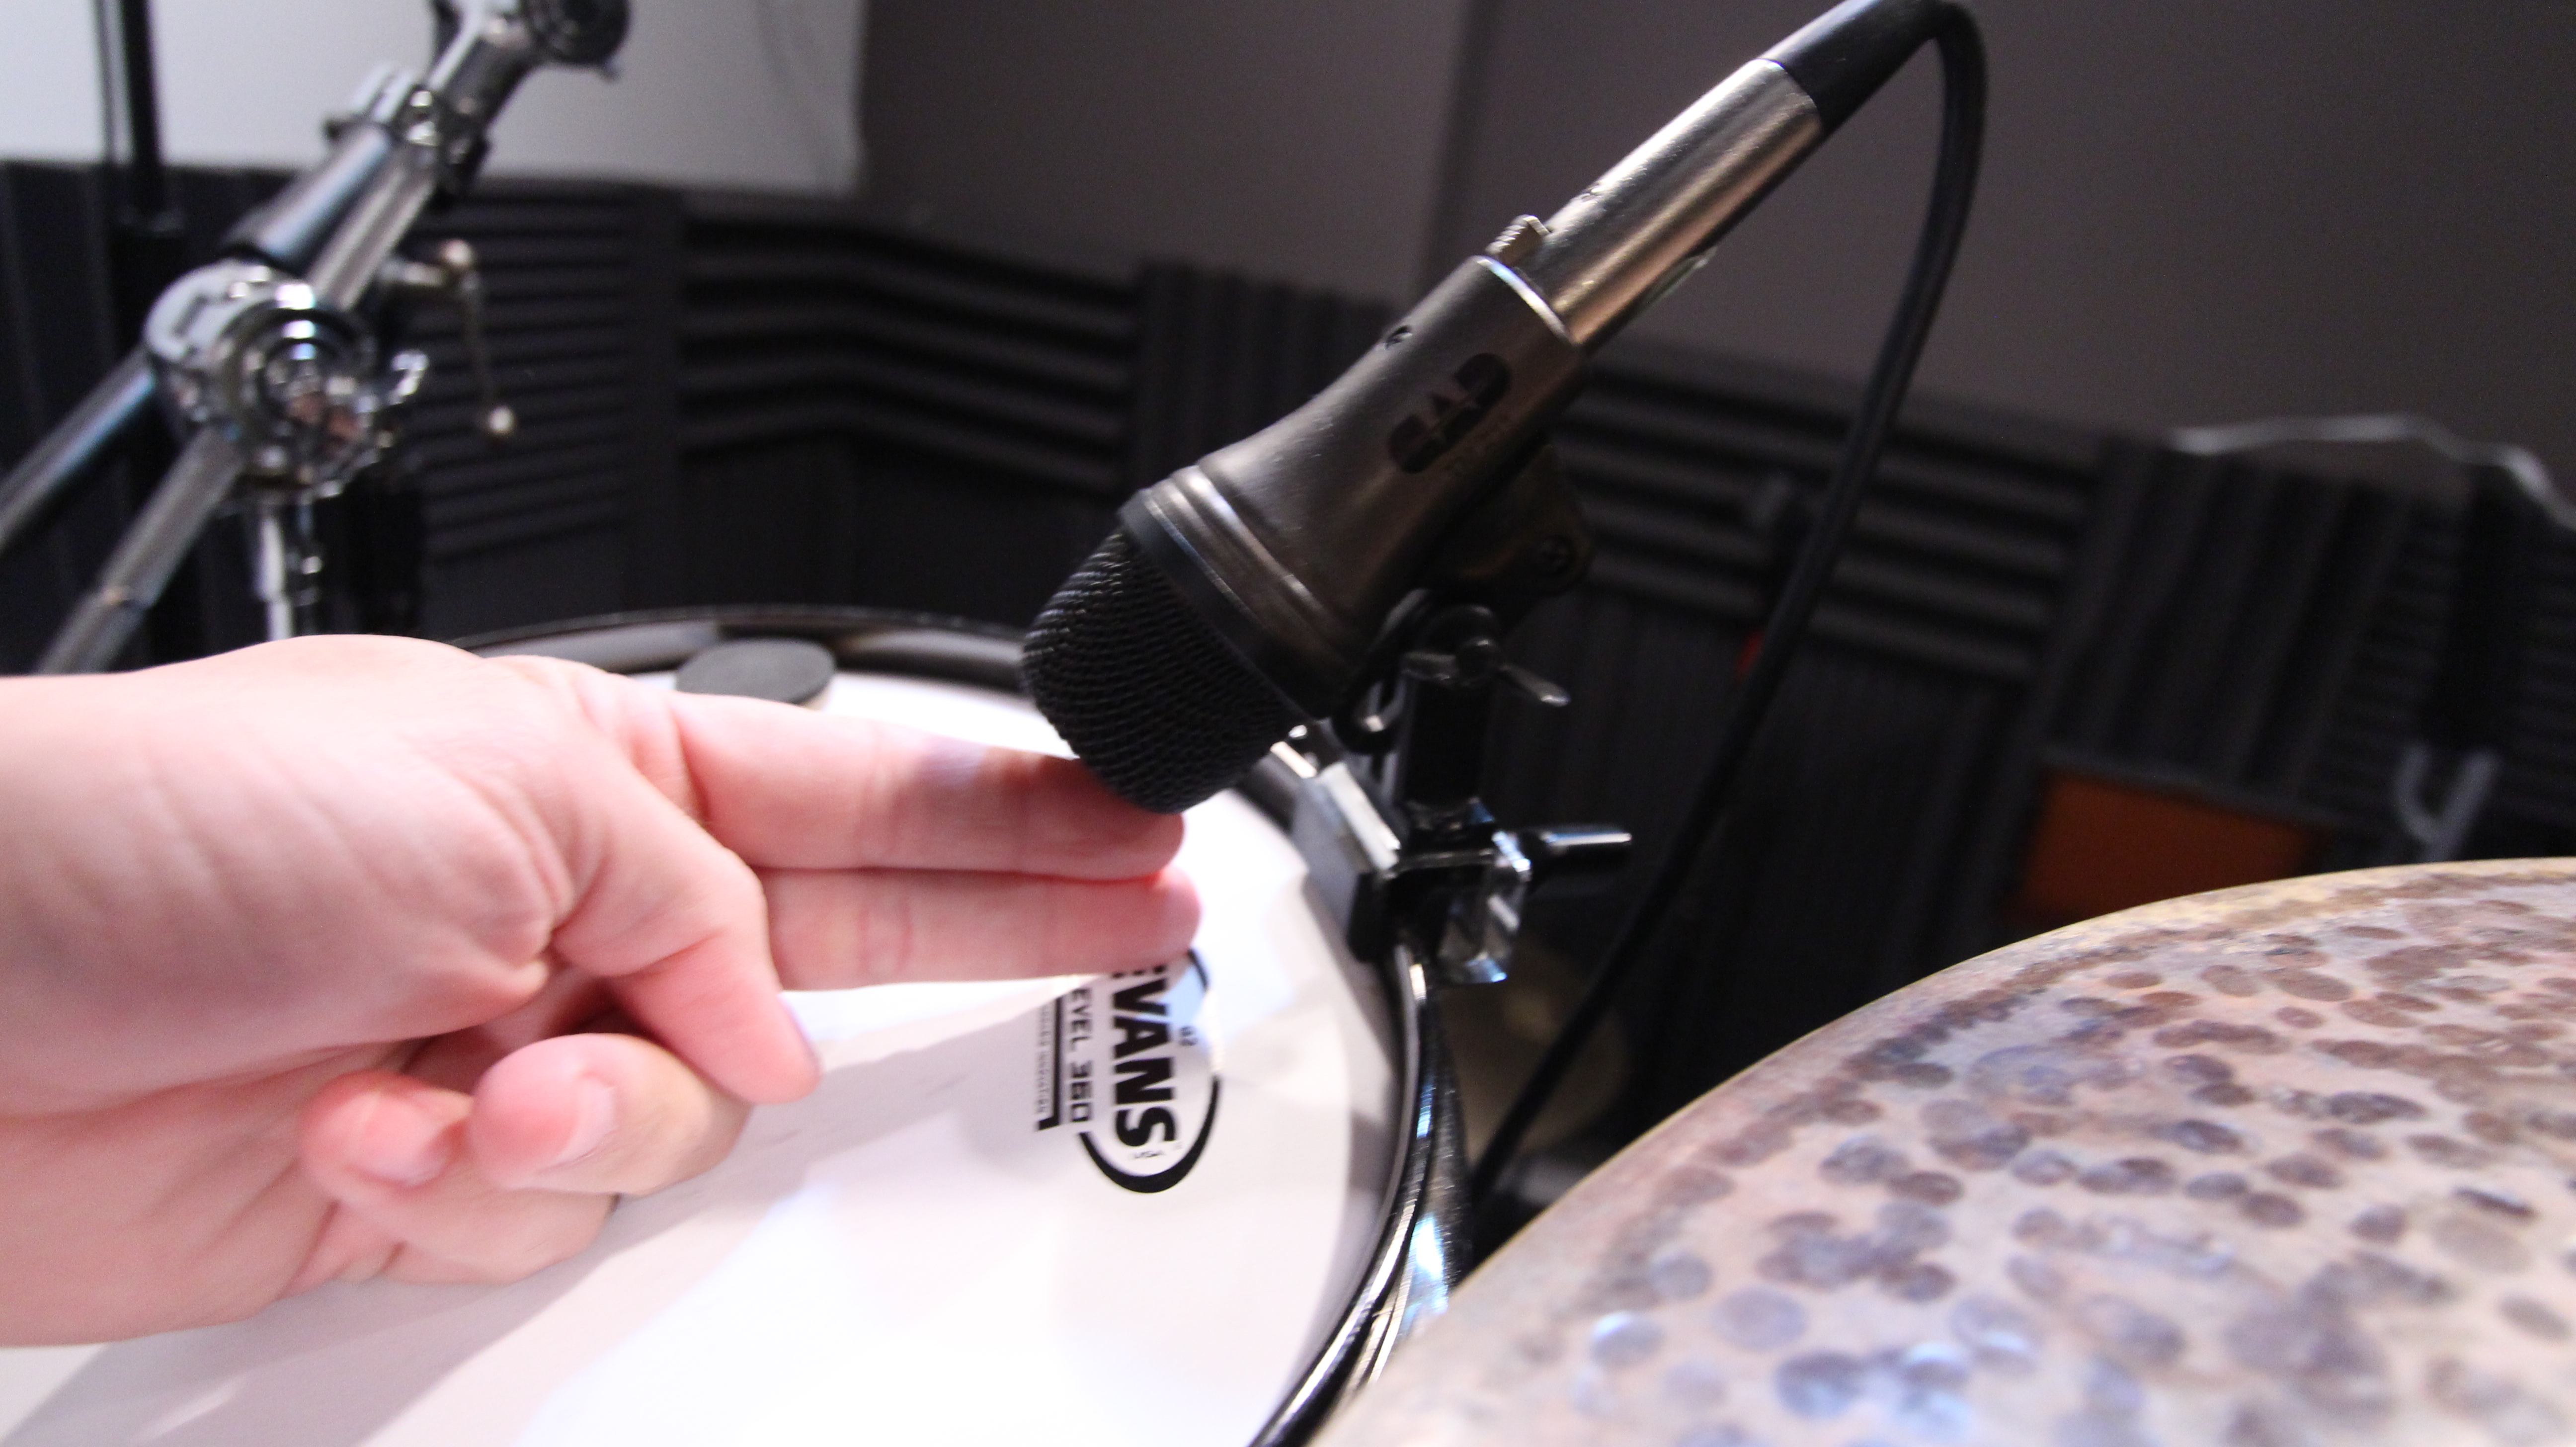
2.) Snare drum: Next we move on to the snare drum. Start by angling the mic at roughly a 45 degree angle from the center of the drum.

Snare Drum Mic Placement
Your height will vary but a good starting point is approximately the width of 3 fingers off the rim of the drum. Things to note as you test your sound, the more the mic is pointed directly at the snare, the more low and high end you will get. Ideally you want to get a good blend of sound coming off the drum and the sound of the stick hitting the drum.
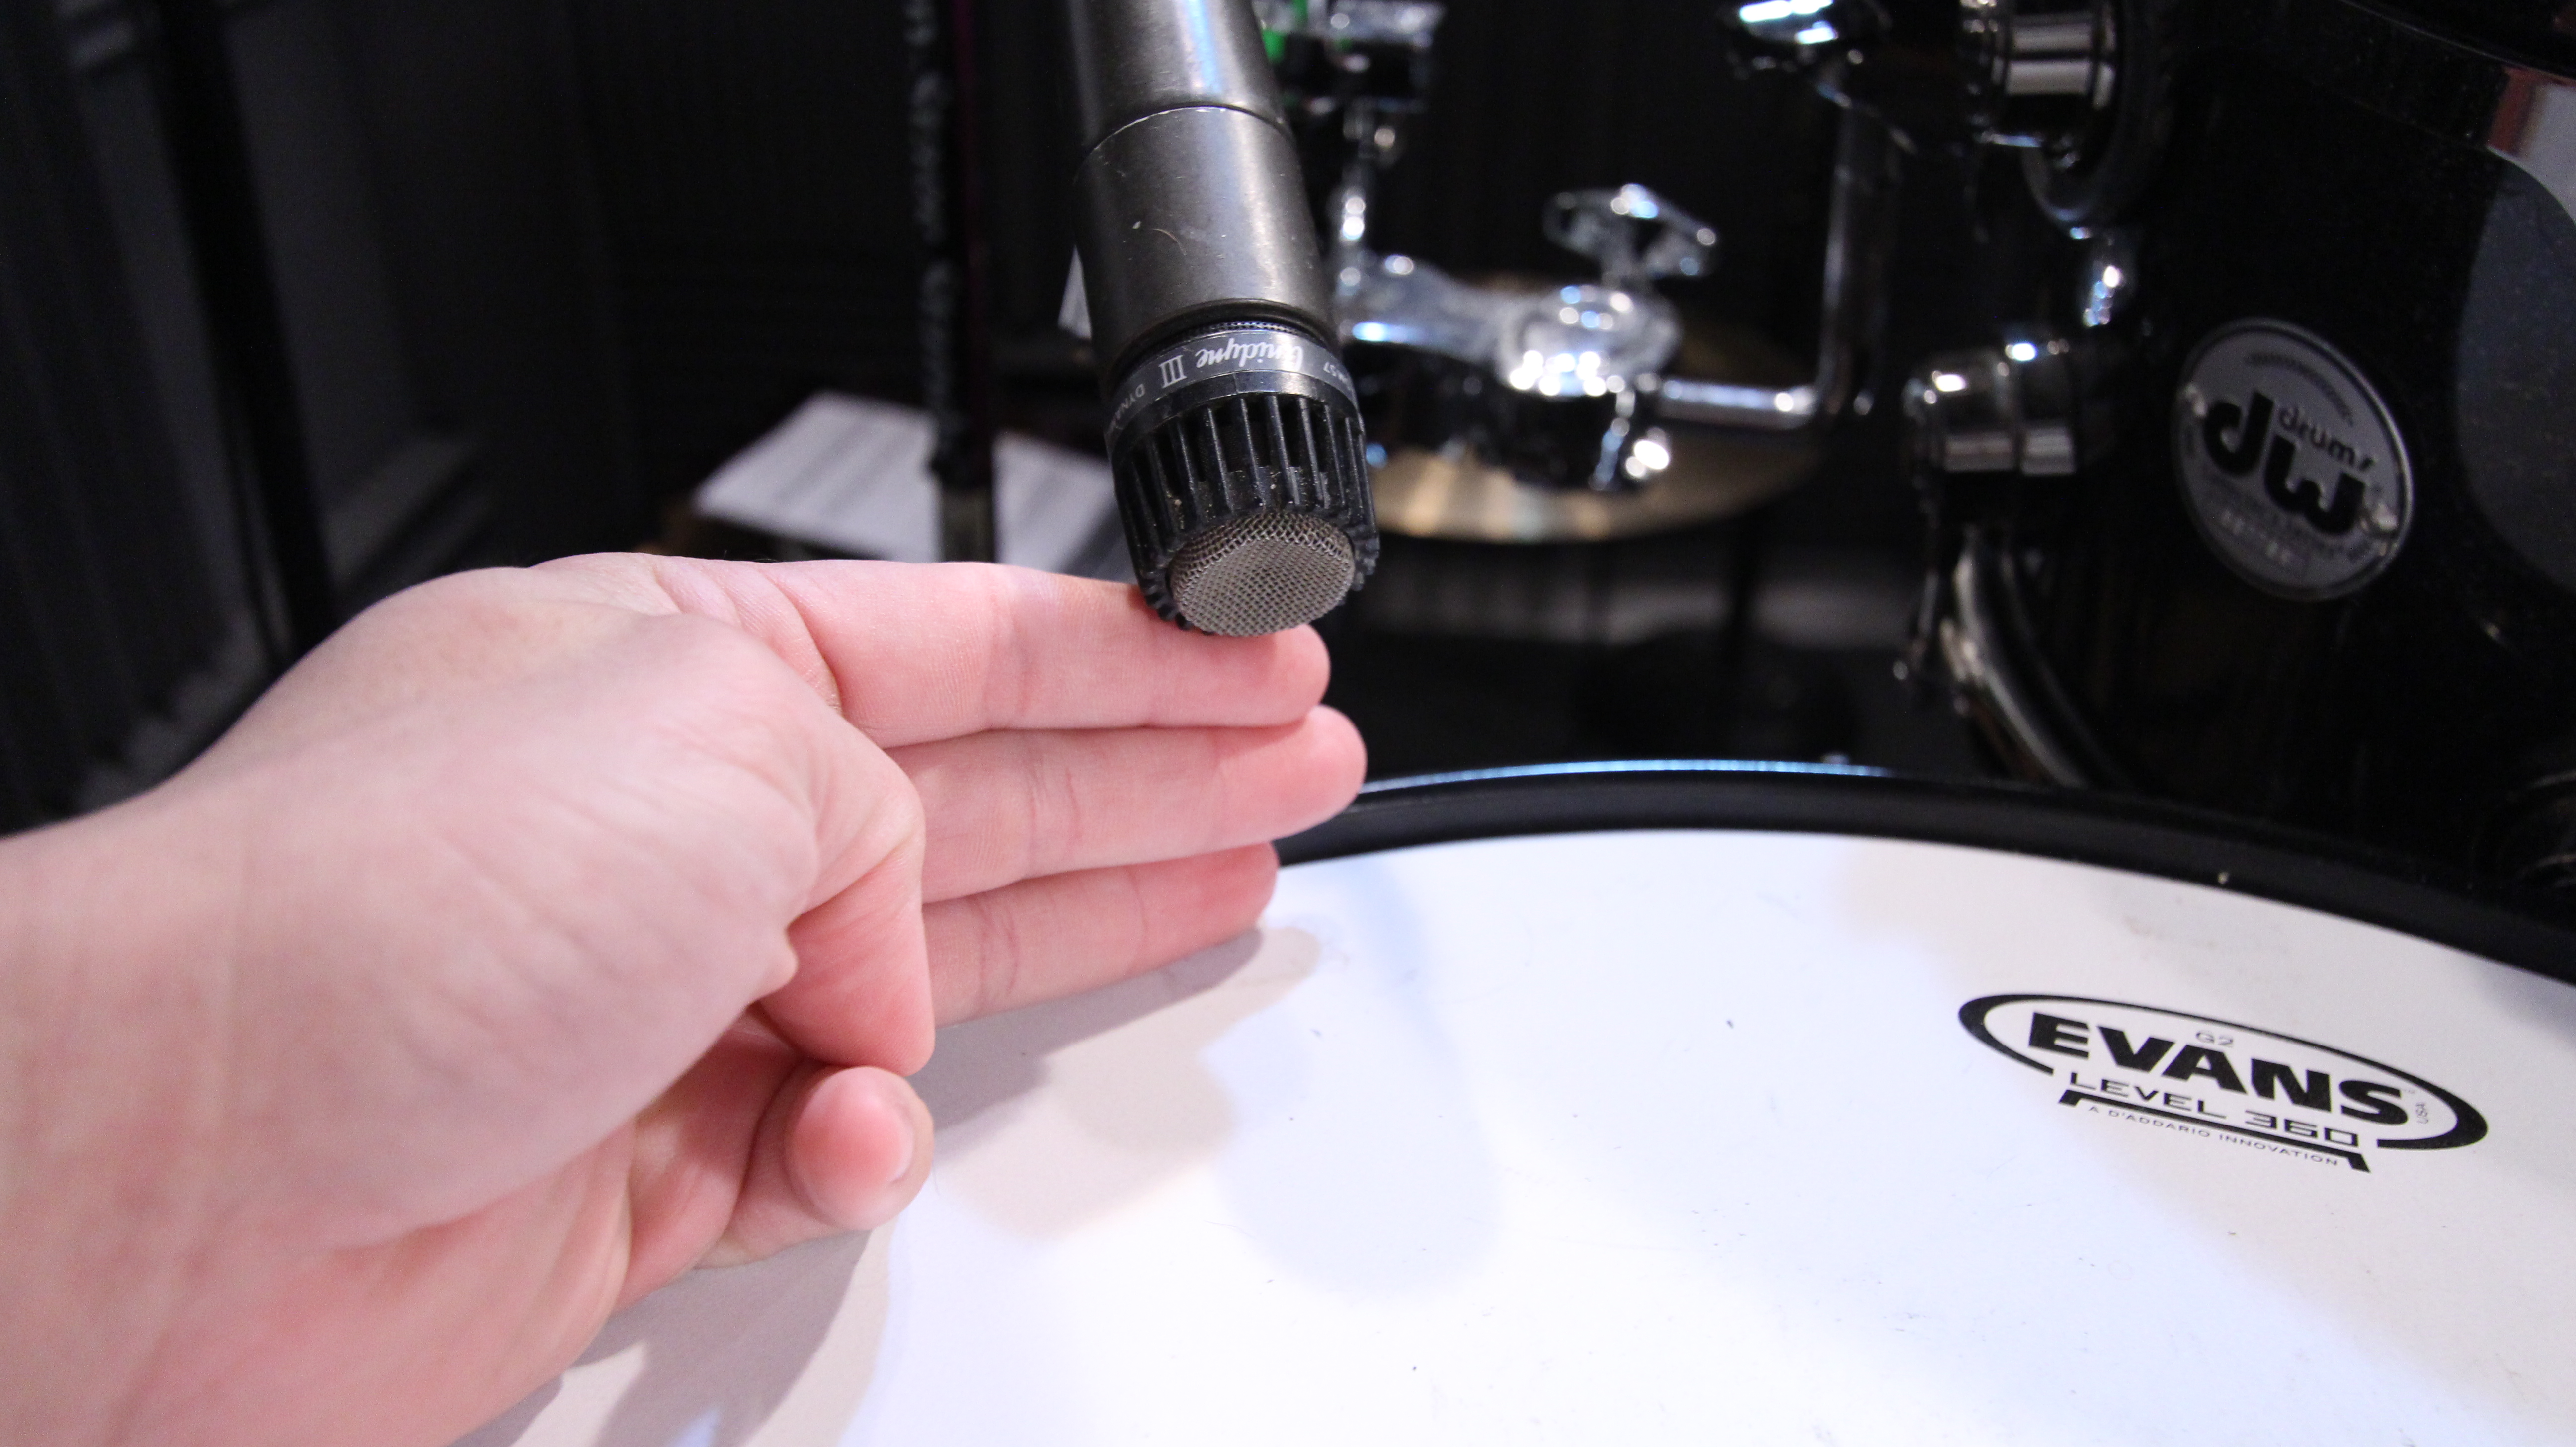
Three finger width Mic Placement
After setting your mic at approximately a 45 degree angle, work your way in from the rim of the snare towards the center of the drum. Depending on the sound your looking to achieve, placing the mic closer to the rim gives you more of a ringy tone.
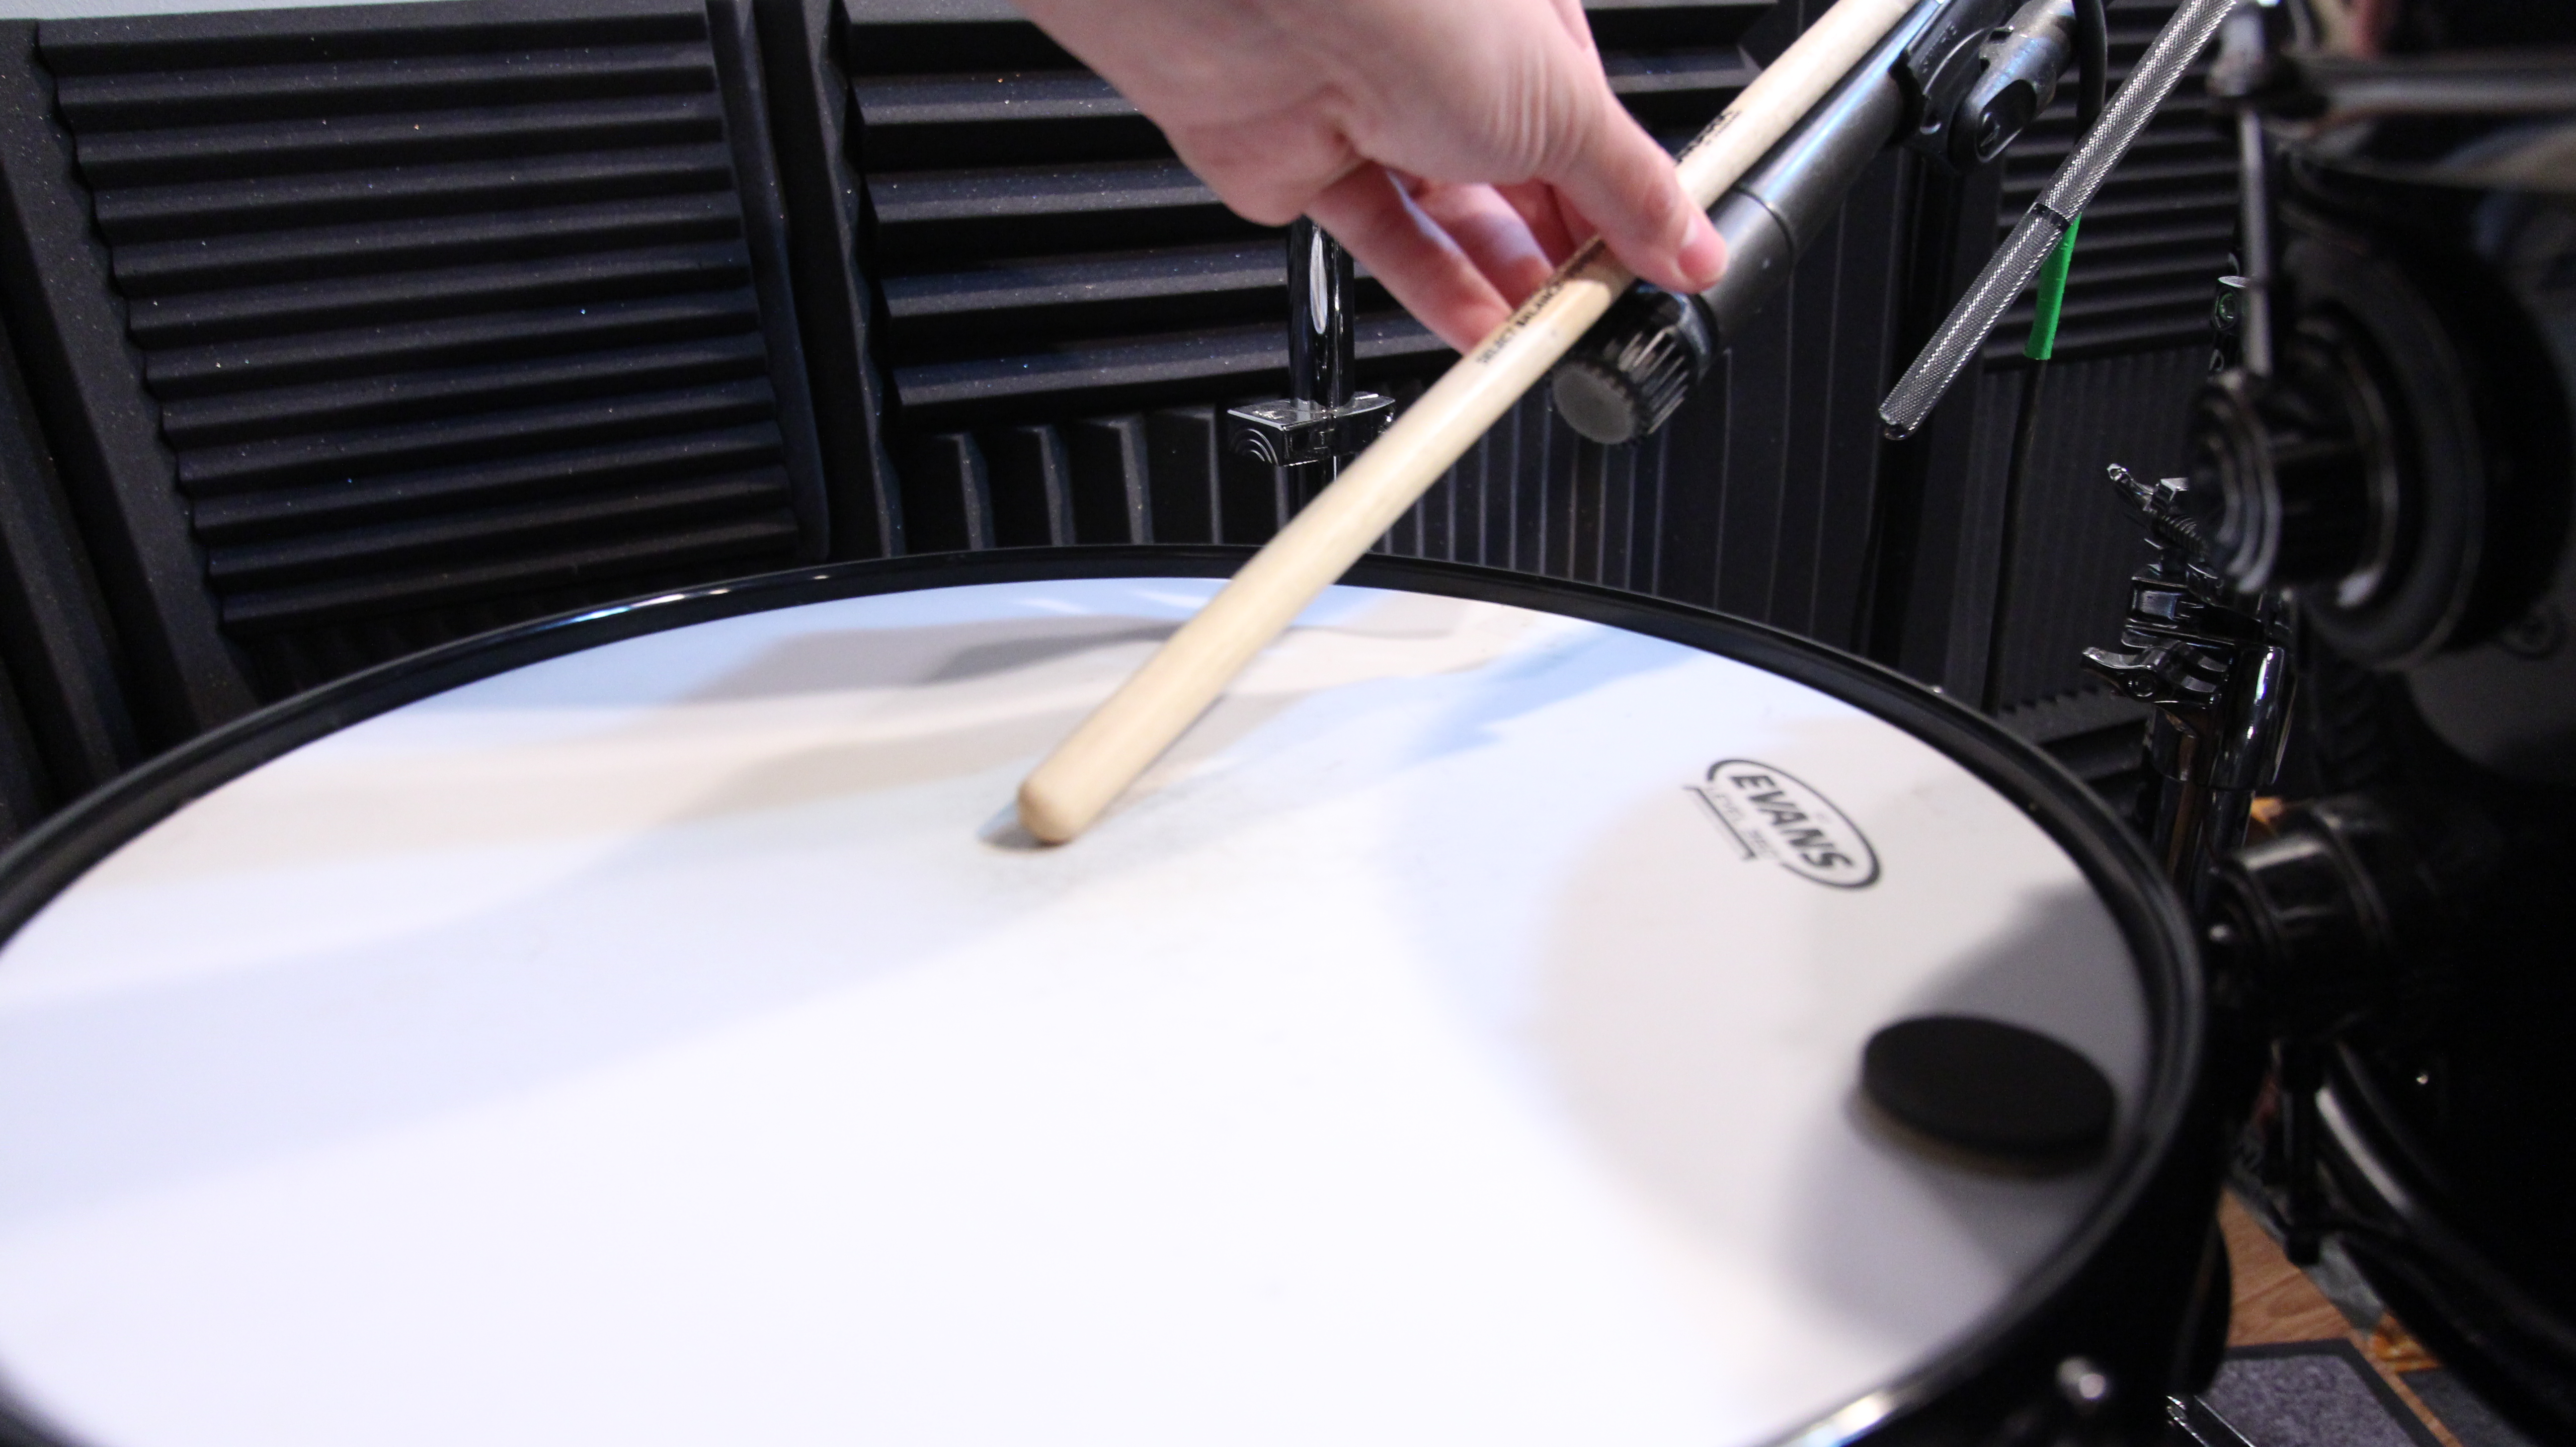
45 Degree mic placement angle
3.) Toms: We place our tom mic’s in a similar fashion as our snare drum mic. Start with a 45 degree angle from the center of the drum and make your adjustments from there. Things to consider: You want to limit the amount of “bleeding” from other sources like cymbals by keeping the microphone no more than 2-3 finger widths off of the drum. Also, consider the size of the tom you’re micing when finding the right mic placement. Be consistent with your tom placement by measuring the distance from the center of the drum to the microphone. place all of your tom mics by using the same distance from the center of the drum. As a result, your floor tom mic should be further away from the rim and closer to the center of the drum.
Two Finger Width Mic Placement
4.) Overheads: Last but not least, we need to setup our Overhead mics. There are various techniques that can be used. The most common is using a “spaced pare technique”. This means we will have one overhead mic on each side of the kit to achieve a full kit image. The closer the overhead mics are to the kit, the more cymbal definition you will achieve. With our overhead placement we will start by placement our mics just outside of our furthest crash cymbals. From here we will work our way in by using the center of our snare drum as our mid point. Use a tape measure or a mic cable to measure the distance from the center of your snare drum to the overhead microphone. This technique will help us make sure both overhead mics are equally placed from the center of the snare drum.
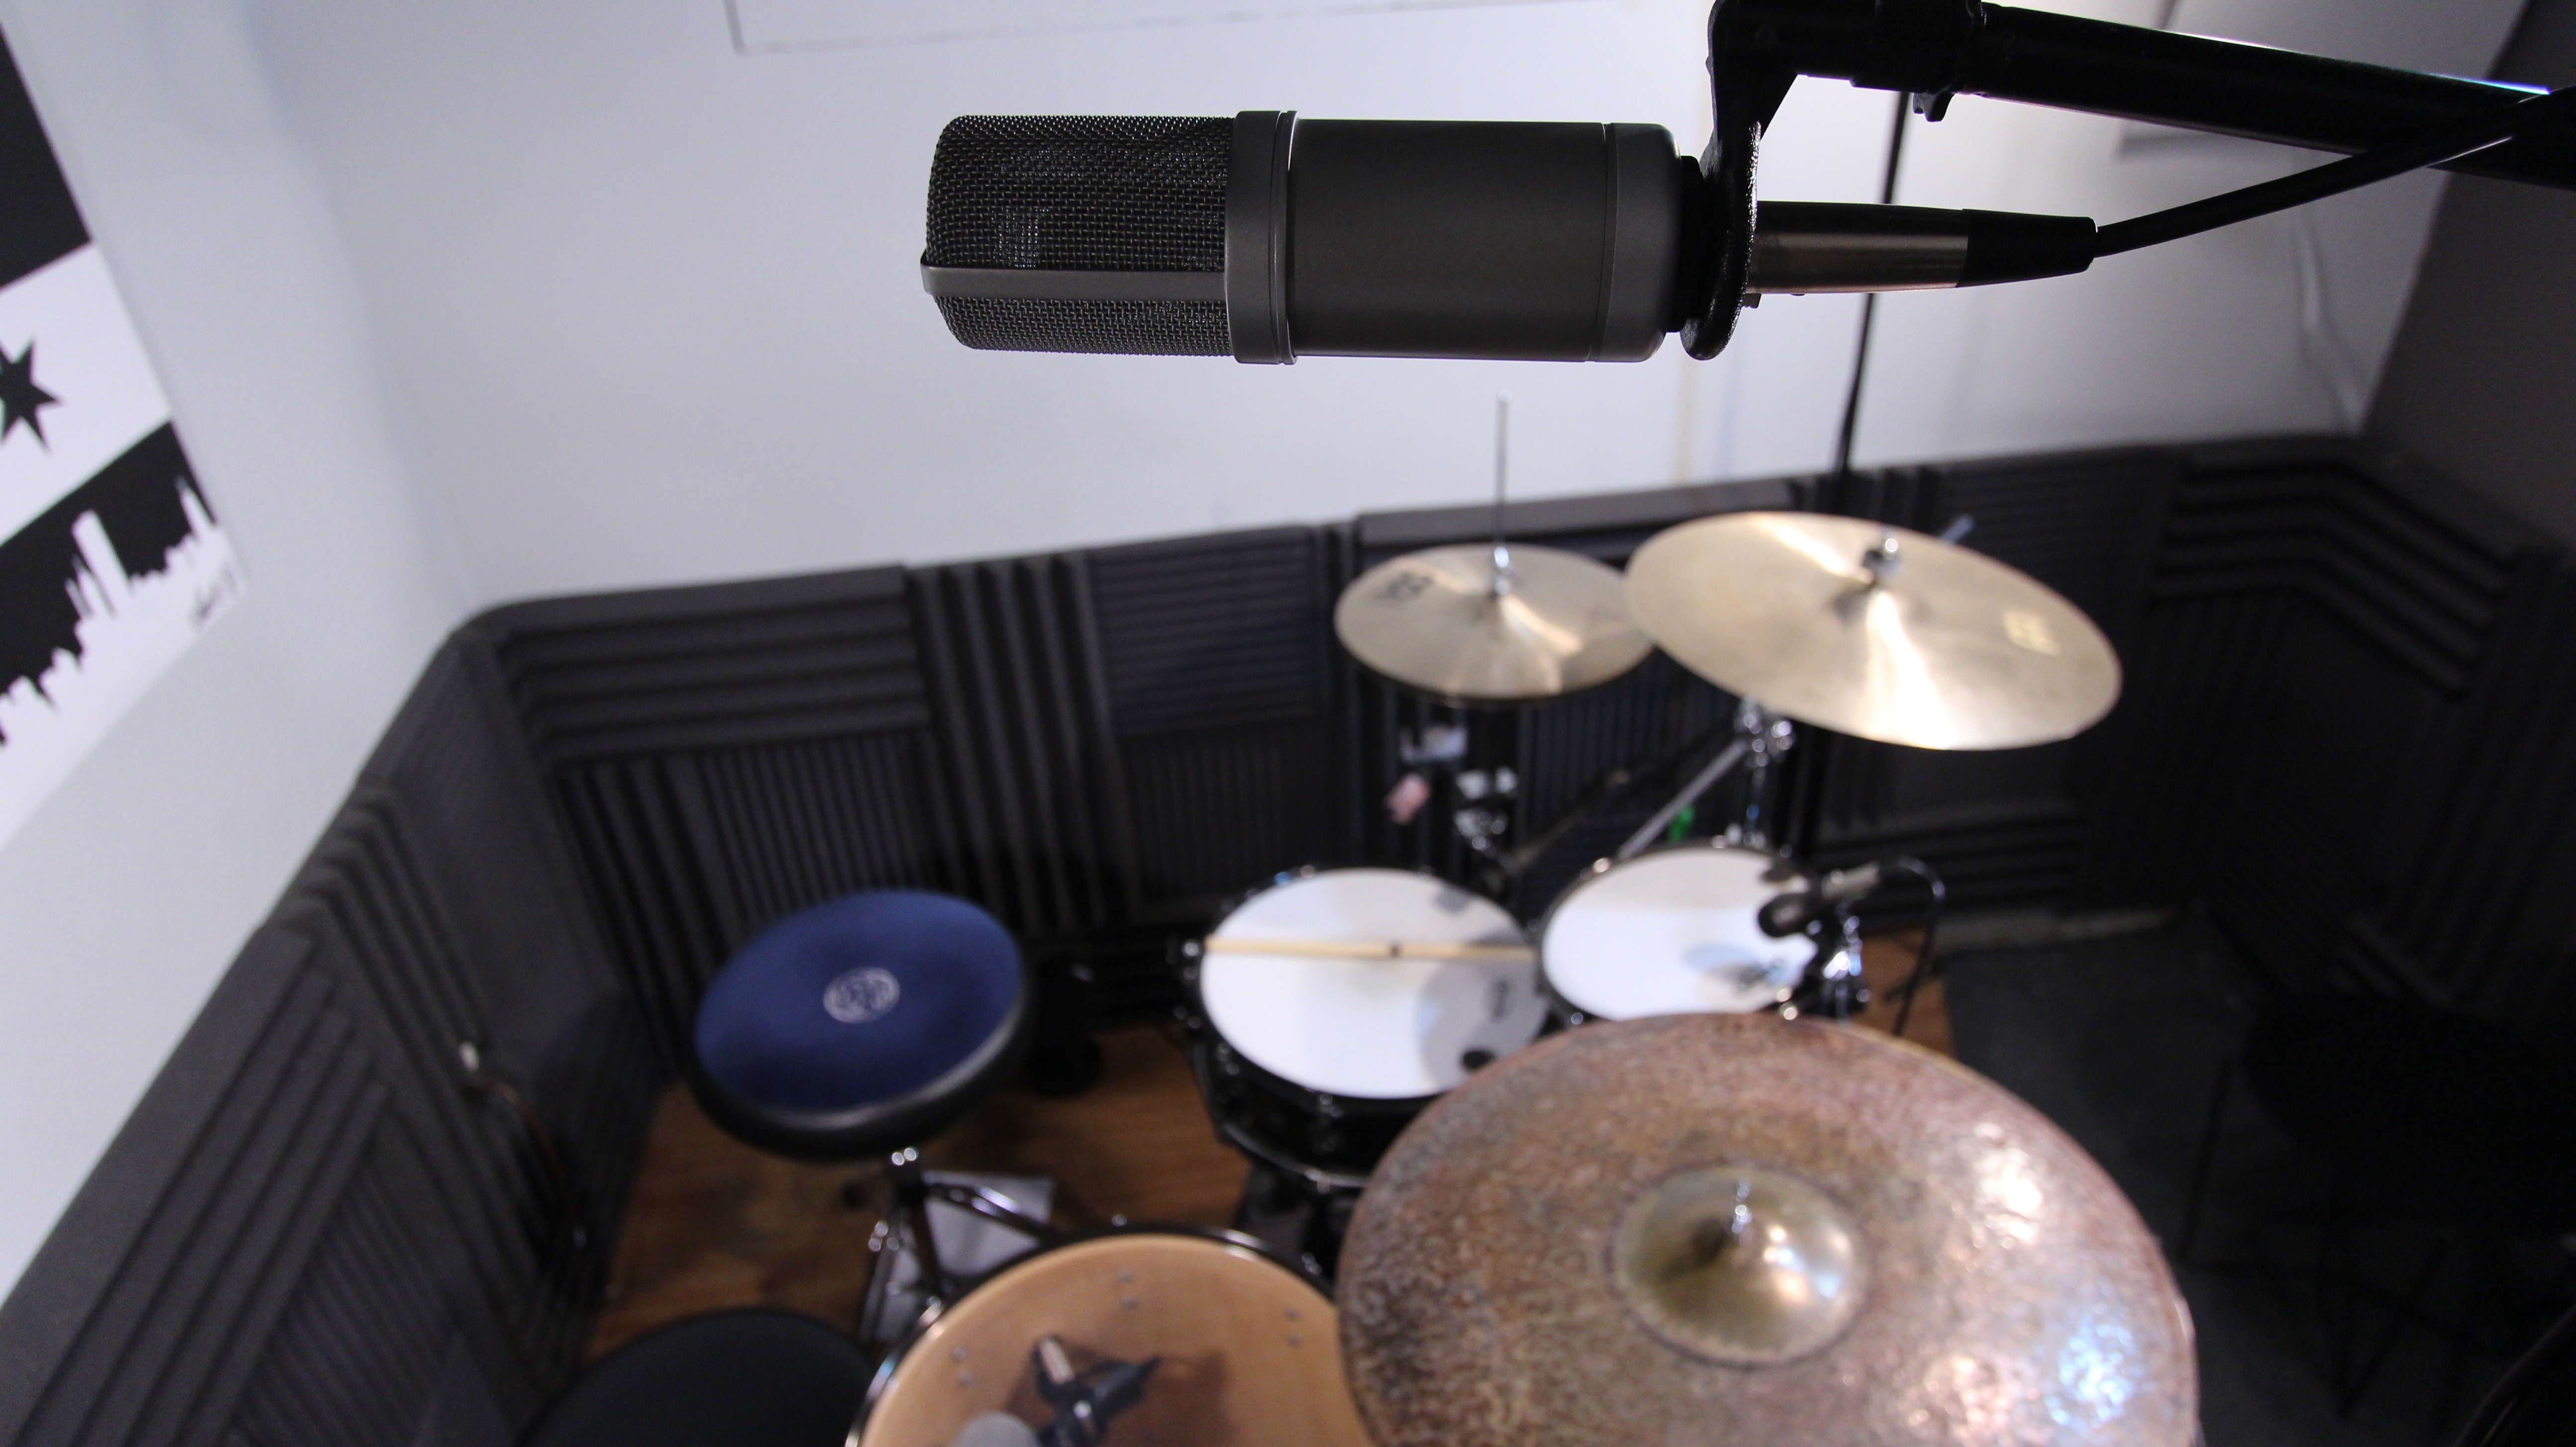
Overhead Mic Placement
Things to keep in mind. These are general guidelines that will give you a great starting point. Every room is different so there isn’t one clear cut way to achieve a good drum sound. However using these techniques will give you a great starting point where you might only need to make minor adjustments. Ultimately take your time. Experiment and find out what works for your particular room. Once you’ve dialed in your mic placement, document it. Take measurements, pictures or even video. It will save you time next time you record a new drum cover.
Next week we will go over Protools, the digital audio workstation used to record, edit and produce audio files for drum cover videos. Much to cover, you won’t want to miss it!
Don’t forget to get involved, subscribe to the blog and have your questions answered. As always, like share, and comment.